Easy iced thumbprint cookies are an all-time favorite. With sweet icing and tender cookies, they are great for any occasion.
This post may contain affiliate links. If you click on a link and make a purchase, I may receive a small commission at no extra cost to you. For more information, please read my disclaimer.

Thumbprint cookies are classic, delicious, and versatile! Because the color of the icing can change with the season, you can make them for any holiday.
I like to make them at Christmas, or for occasions like a baby shower, or a family get together!
This recipe makes a tender thumbprint cookie with an icing center. Icing flavors you can use include: buttercream icing, chocolate icing, and icing with sprinkles.
With just a few ingredients you can make delicious shortbread thumbprint cookies!
Here’s what I’m going to teach you in this post:
- How to make iced thumbprint cookies
- How to keep them from cracking
- The best icing to use for thumbprint cookies
- How to ice the thumbprint cookies
I’ll break the recipe down into simple steps. Plus I’ll cover several tips on how to make your cookies perfect every time. Let’s get started!
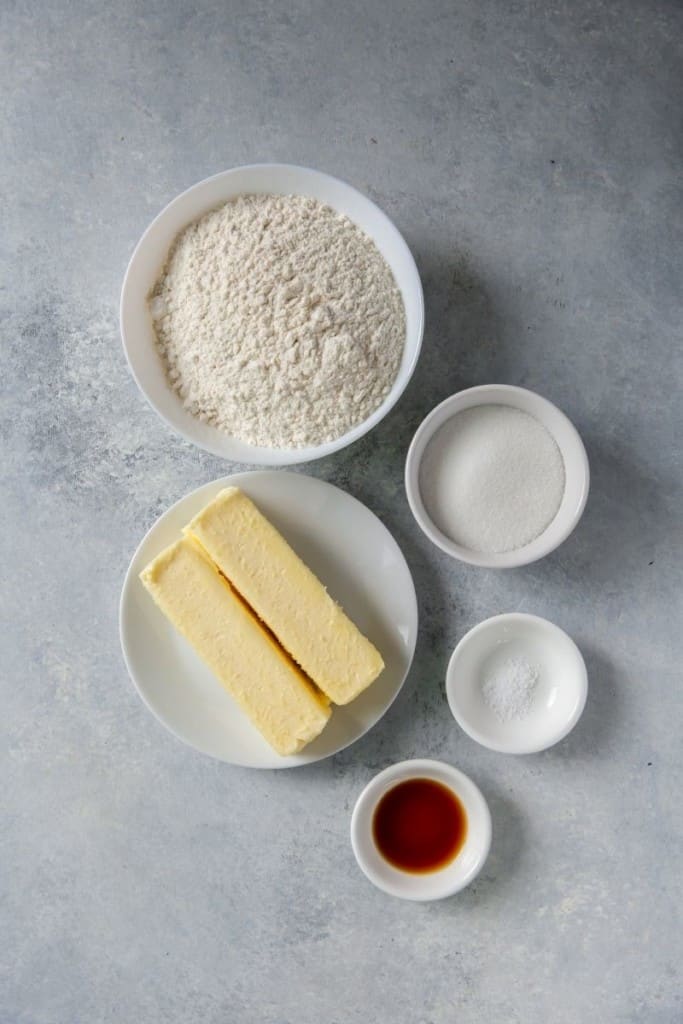
HOW TO MAKE ICED THUMBPRINT COOKIES
A full printable version of this recipe with ingredient measurements is available at the bottom of this post.
STEP ONE: Cream together the butter, sugar, and vanilla. Slowly add in the dry ingredients. Then cover the dough with plastic wrap. Chill for 1 hour.
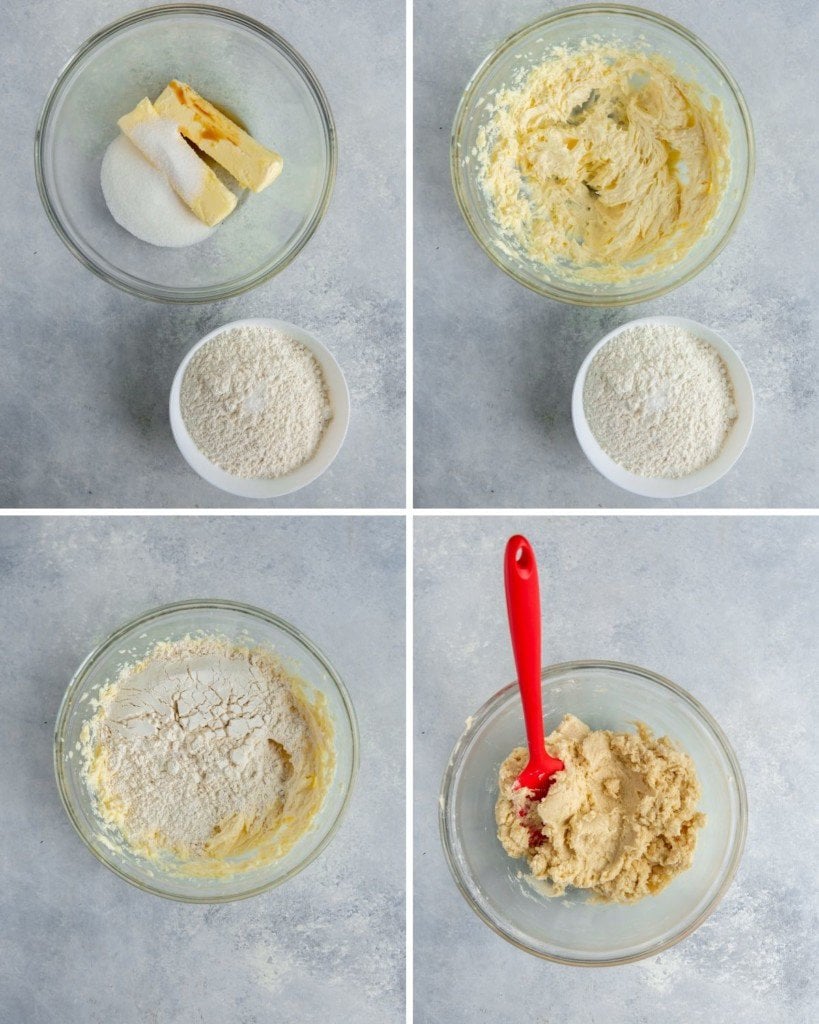
STEP TWO: Preheat the oven to 350 F. Line a baking sheet with parchment paper so that the shortbread cookies don’t stick.
STEP THREE: Form cookie dough balls. Place them on the baking sheet. Use your thumb or the back of a small measuring spoon to make a small hole in the center of each cookie.

STEP FOUR: Bake for 10 minutes or until they are slightly firm. Take the back of a spoon, and press the indentions again.
Place the cookies back in the oven. Bake for 6-8 minutes. Cool for 1 minute. Then place on a wire rack.
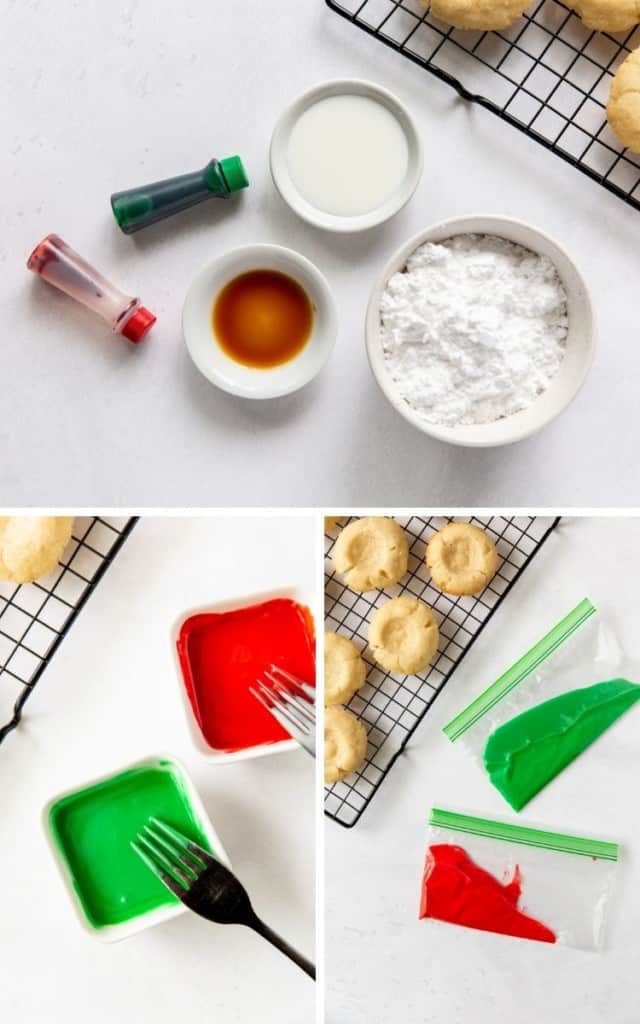
STEP FIVE: Combine the powdered sugar, milk, and vanilla together using a whisk. Half the icing into separate bowls. Add in a few drops of food coloring to each bowl and whisk.
To thin the icing out, add more milk if needed. Place icing in a plastic bag, and cut off the corner. Fill the centers of the cookies. Let them sit overnight to set up.

HOW DO I KEEP MY THUMBPRINT COOKIES FROM CRACKING?
To prevent the dough from cracking, check that the batter is consistently mixed up before you roll them. Be sure that the rolled dough ball is tightly packed and not falling apart.
Lightly push down with your thumb or a spoon. Try not to push your thumb down too hard or quickly. Create a slight indentation and then stop.

CAN YOU FREEZE THUMBPRINT COOKIES?
If you want to keep thumbprint cookies on hand, I recommend freezing the dough itself. You can make a double batch, and set aside some extra dough to freeze for later.
Tightly seal dough into a freezer bag. The dough will stay good for up to 3 months.
When you’re ready to eat them, take the dough out of the freezer. Let them thaw. Then bake as normal.

DO YOU PUT ICING ON THE COOKIES BEFORE OR AFTER BAKING?
The icing should be added after baking, when the cookies have cooled. You can use a homemade cookie icing recipe or another frosting such as buttercream frosting or chocolate frosting.
For best frosting results, apply the icing to the center, and let it set up overnight. If you don’t have time overnight, allow for at least ten minutes.

HOW TO ADD SPRINKLES TO ICED THUMBPRINT COOKIES
You can’t have cookies without sprinkles right?!
These thumbprint cookies can be made with icing and sprinkles if you prefer. You can choose to apply the sprinkles in the icing center or on the outside of the cookie.
If you choose to add sprinkles to the outside of the cookie, roll the raw dough in sprinkles, then place on the baking sheet to cook.
If you want to add sprinkles to the icing center, simply sprinkle some onto the fresh icing after cooking, and let it dry.

OTHER ICING IDEAS TO USE
If you choose to use pre-made icing such as chocolate frosting or buttercream frosting, that’s fine too.
You can easily apply pre-made icing in the center of the thumbprint cookie with an icing dispenser.
Another way you can apply it is by placing the icing into the microwave for ten seconds at a time to melt.
Once it melts, you can pour the icing into the center of the shortbread cookie. Allow time for the frosting to set up again.
Other Cookie Recipes You’ll Love:
- Toffee Thumbprint Cookies
- Strawberry Thumbprint Cookies
- Raspberry Thumbprint Cookies
- Snickerdoodle Recipe
- Lemon Shortbread Cookies
- Slice and Bake Cookies
- Lemon Curd Thumbprint Cookies
- 35 Easy Christmas Cookies
- Chocolate Kiss Cookies
- Three Ingredient Peanut Butter Blossoms
- Hershey Kiss Cookies
- Chocolate Chip Cookies Without Baking Soda

Easy Iced Thumbprint Cookies
Ingredients
- 1 cup unsalted butter softened
- 1/3 cup sugar
- 1 teaspoon vanilla extract
- 2 cups all-purpose flour
- pinch of salt
For the Icing
- 1 cup powdered sugar
- 1 1/2 tablespoons milk
- 1/2 teaspoon vanilla extract
- Red or green food coloring optional
Instructions
- In a medium bowl, cream together butter, sugar, and vanilla for 2-3 minutes until fluffy. Scrape down the sides of the bowl, then add the flour and salt, mixing until incorporated.
- Cover the bowl with plastic wrap and chill for at least 1 hour.
- When ready to bake, preheat the oven to 350 degrees F. Line 2 baking sheets with parchment paper and set aside.
- Roll the dough into 1 ½-inch balls, and place 1 inch apart on the prepared baking sheets. Use your thumb or the back of a round measuring spoon to press a small hole in the center of each ball.
- Bake for 10 minutes, until slightly firm, then remove baking sheets from the oven. Use the spoon to press into the indentations in each cookie again, then return to the oven and bake for an additional 6-8 minutes, or until lightly browned. Let cool 1 minute on the baking sheets, then transfer to a wire rack to cool completely.
- In a small bowl, whisk the powdered sugar, milk, and vanilla together in a small bowl until smooth. Divide the icing in half and add a few drops of food coloring to each, whisking to incorporate. Add more milk if needed, but not so much it becomes runny. Pour icing into plastic zipper bags, snip off a corner, and fill the center of each cookie. Allow to dry and set overnight.
Video
Nutrition
This nutrition information is based on the exact products I used in this recipe. Brands and sizes of products could alter exact nutrition and should always be calculated independently.


These are so good and versatile for any holiday
Love this! This is perfect especially for the kids. Thanks for sharing this!
I love shortbread and usually just bake them with a dusting of sparkling sugar. I love the thumbprint idea! Thanks for sharing!
Delicious and easy! Love these!
Is it ok to put a peppermint kiss in the center instead of the icing when they come out of the oven? Thank you
Hi Pam, yes, you can do that! I would put the kisses in the fridge while the cookies are baking, then place them on top to help them from melting.